There are many places you can buy gifts for the miniature aficionado but I would like to highlight three of my favorite. These are unsolicited recommendations and while I know the owners of my first two sources, neither of them asked for this endorsement.
SQUINTBOX
I have highlighted Darren Scala’s miniature shop in other blogs so here I want to recommend a wonderful and unique gift idea that he offers. It is called SquintBOX and it is a subscription box of miniatures that arrive on a monthly basis. They come delightfully wrapped and are a pleasure to open. Each month is themed and the surprise element of receiving these handmade will please any miniaturist. See more details at the SquintBOX site. Some images from this month’s holiday box are below.
Wiring the spot lights
House with Occupants, 100 B.C.–A.D. 200 Nayarit, Ceramic; H. 12 X W. 10 1/4 x D. 6 3/4 in. (30.5 x 26 x 17.1 cm) The Metropolitan Museum of Art, New York, Promised Gift of Joanne and Andrall Pearson (TR.95.2015) http://www.metmuseum.org/Collections/search-the-collections/319227
LED strip lighting inside the cabinets
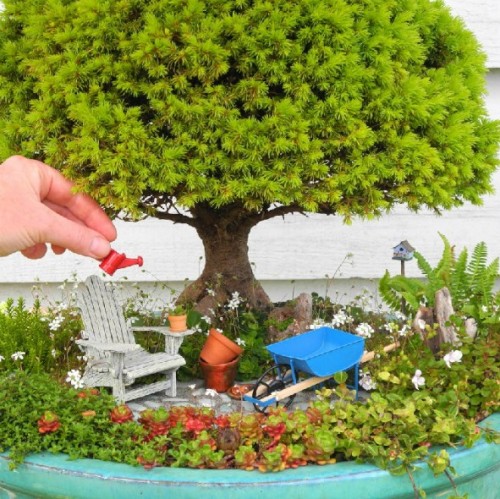
TWO GREEN THUMBS
If your favorite miniaturist is also a miniature gardener, the shop called Two Green Thumbs Miniature Garden Center has the perfect gifts. I have also featured Janit Calvo’s shop before and Janit is the author of the best book on miniature gardening. She not only has excellent plants but her accessories are perfectly scaled and her emails and website are a vital source of mini gardening ideas.
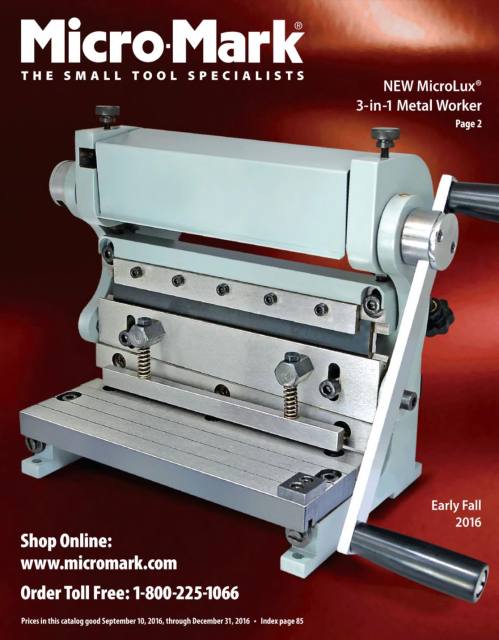
MICRO-MARK
Micro-Mark calls itself the “small tool specialist” and there is no doubt that this is the best source of tools for the miniaturist. Last year I received one of their gift certificates as one of my holiday presents and it was wonderful shopping on the site. You can look at their catalog online but I recommend getting a print copy sent as well: fun to browse.
For many years, those of us who are miniature gardeners have had a hard time explaining to people what we do and how we do it. It wasn’t until the publication last year of Janit Calvo’s’ wonderful book, Gardening in Miniature, that there was an excellent resource that we could point interested folks to. You can get the book on Amazon, Barnes and Noble, or Janit’s own site, Two Green Thumbs. You can also get it as an eBook.
The best thing the Flower Show did this year was to invite Janit Calvo to give a talk on miniature gardening. Speaking to a large crowd (you can see more photos and her account of the talk on her blog) Janit put together a miniature garden in a large pot in less than 45 minutes, explaining along the way all sorts of useful ideas about scale, composition, the use of accessories, hardscaping, and so many other topics. Ron and Katy Hoess joined me in listening to Janit and we were all amazed at how much we learned. Keep in mind, as Janit pointed out both in her talk and in her blog description, that what we do in Miniature Settings is very different from the miniature gardens she was demonstrating. Although we use many of the same plants and techniques, outdoor and potted mini gardens are meant to last for years while our settings, alas, must simply make it through the 9 days of the show (although all of mine are still flourishing and even flowering!).
Janit Calvo beginning her talk in the Gardener’s StudioTrimming the plants to fit in the pot.Adding accessories.
Because of Janit’s presentation (I have already read her book) I have vowed to convert every pot, broken pot, patch of land, and top of tree stumps into miniature gardens this summer. I have Janit’s demo garden from the talk as a starter and I hope I can be a good mom to it for years to come.
Before and after her talk, I spent many delightful hours with Janit, looking at the dish gardens in the Hort Court, checking out all the vendors selling mini accessories (many more than ever before), and just generally discussing the pleasure we take in this activity. Most of the mini gardening accessories we saw were for “fairy gardens” which are must less concerned with making a scene look realistic and in scale.
So thank you, Janit, for the inspiration and the ideas, and for legitimizing miniature gardening as a fun, creative, imaginative, and valuable activity. I highly recommend that you subscribe to her free monthly newsletter. Every time it comes, I am surprised and fascinated by the news and stories in it. You can shop for plants and accessories on her website, Two Green Thumbs.
There is nothing more amazing that putting plant material in a growing medium and having tiny baby pants develop. For miniature gardens, these homegrown mini-plants are essential if you want to control the size of your plants and also the number of them. When I want to propagate a lot of material, I take cuttings from inexpensive plants I buy in garden centers, hardware stores, and grocery stores. I also use plants growing in my yard and in my neighborhood.
When I need a mature, high quality plant, I buy it from Meehan’s Miniatures, Meadowbrook Farm, or online miniature plant sources, especially Two Green Thumbs (owner Janit Calvo writes a great miniature gardening newsletter). Keep in mind that some plants you buy from professional growers may have propagation restrictions and you may not be able to use them as source material. Also, the miniature plant growers mentioned here and in other posts on this blog provide high quality, rooted and healthy plants that should last a long time. Your homegrown ones may be as strong or not last as long.
Propagating plants for a miniature display requires an eye for proportions as well as good timing so the plants are the correct size when they are needed. Here are some guidelines for your own miniature plant propagation. Remember that for the Philadelphia Flower Show, the miniature plants used must be rooted (if they are on the list of plants submitted to fulfill the 8-plant requirement). The times for each propagation technique indicate a rooted and growing plant.
Seeds (3-12 weeks)
Plant seeds in a growing medium and keep damp. Bottom heat can help some seeds germinate faster. Give the seedling a lot of light after they emerge or they will get leggy. Some seeds, like those of wheat grass and other grasses, may sprout and grow very quickly so they are very useful for getting large areas covered with plant material in a short time.
Rumex seeds, started outdoors, ready to be transplanted
Stem cuttings (2-4 weeks for soft, 6-12 weeks for hard)
Take a cutting from the end of a branch, remove the lower leaves, and cut a 45 degree angle in the end with a razor. Place in a mixture of 50% peat and 50% sand. Rooting hormone is optional. Keep cuttings damp but not wet. Tip cuttings from soft stem plants tend to root easily but stems that are hard are a lot more difficult to root. I would use rooting hormone with them but they may still rot before they root.
Tip cutting of a Fittonia inserted into growing medium
Leaf sections (4-8 weeks)
Cut a leaf from a begonia or other plants with prominent veins and cut it into sections that have one large vein each. Stand upright in peat/sand mix. Or cut across the veins in a whole leaf and pin it down to the surface of the peat/sand mix. Cut Sanseviera into sections, let ends dry, then insert larger end into mix. Rooting hormone is not needed. Keep slightly damp.
Begonia leaf section with small plant growing underneathSanseviera sections were cut and dried for a few days and placed in gritty growing medium. Miniature plants take a few weeks to sprout but grow quickly afterwards.Large cut leaves should have small stones placed on their surface so the cuts contact the growing medium. Here whole leaves and whole leaves with cuts are being propagated in a grocery story rotisserie chicken container! Add the cover and it is a perfect miniature greenhouse. Keep it damp but not wet or the leaves will rot.
Whole leaf (4-8 weeks)
Take a whole leaf from an African violet (Saintpaulia), peperomia, begonia, hoya, or other plant with fleshy leaves. Trim the stem to about one inch. Insert in mix of peat and sand up to the bottom of the leaf edge. Keep slightly damp.
A leaf of Saintpaulia sprouted a miniature version.A Begonia sprouts a plant from its cut tip when the tip is planted but the leaf is not in contact with the growing medium.A successful Begonia whole leaf propagation. Many leaves will rot but don’t be discouraged because the successful ones are spectacular.Sources of whole leaf propagation material including Saintpaulia and Begonia.Leaves being propagated in a take-out food container.
Succulents (4-12 weeks)
Remove a leaf from the succulent and let the end callous (dry) for a day. Insert in a sand/peat mix and a small plant will grow from the base. Keep the growing medium almost dry or the leaves will rot.
Succulent cuttings from yard.Single leaf from a Sedum “Burrito” produces a plant.Kalanchoe tormentosa leaves producing plants. The coloration of some seedlings may not match the parent until they grow larger.
Offsets (1-6 weeks)
Some cacti and succulents (especially Haworthia) grow in clumps with immature offsets at the edges. Detach one of the offsets, allow the end to callous, and insert into peat/sand mix. Some of the offsets may already have roots so will start growing immediately.
Mammillaria gracilis fragilis is a clumping cactus and the tiny offsets are easy to remove.Haworthia offsets rooted. The white sand reflects more light on them in a winter greenhouse.Sempervivum (hens-and-chicks) produce offsets that root easily.
Runners (2-6 weeks)
Plants with runners (like Chlorophytum comosum, the spider plant, or many Saxifraga) have baby plants hanging from long stems. The baby plants can be cut off and rooted or can be kept attached, placed in a rooting medium while still attached, and then detached when they have their own roots.
Chlorophytum comosum (spider plant) produces fully formed plants at the end of long stems that easily root.Saxifraga (here a wild strawberry from outdoors) produces runners (also called stolons) with small plants at intervals.
Plantlets (1-4 weeks)
Some plants, like Kalanchoe daigremontiana, produce baby plantlets along the edge of a leaf. When the plantlets are fully formed, remove them from the leaf and plant in a sandy soil mix.
Kalanchoe daigremontiana grows miniature plants on its edges. They root easily and grow in almost any kind of soil.Kalanchoe daigremontiana plantlets starting to grow. These plants can grow anywhere and can be a nuisance in warm outdoor climates but for the miniature gardener they are very versatile. I even have a few floating in water and considering that they are succulents, that is remarkable.


You must be logged in to post a comment.